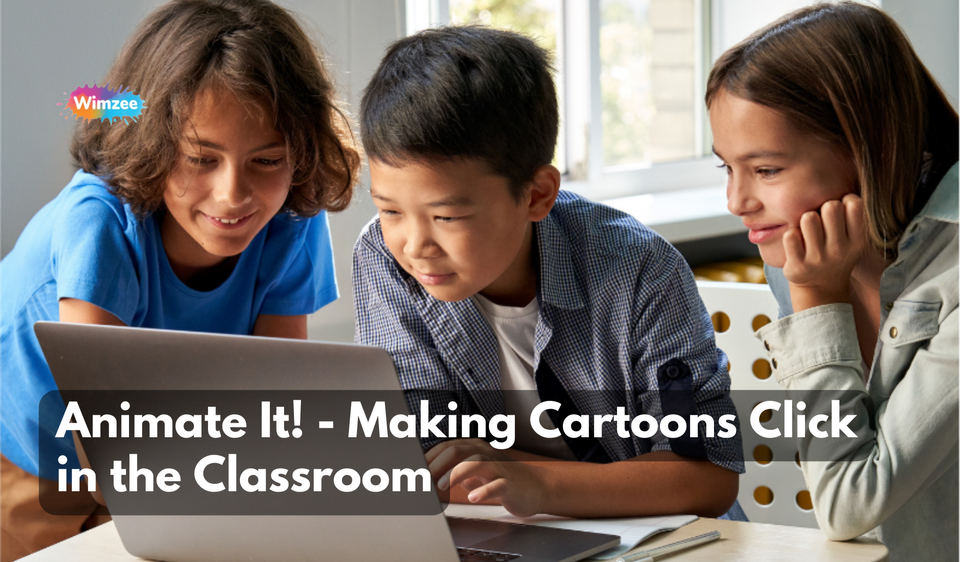
Hey there! Ready to bring some serious fun to your teaching? \"Animate It!\" is your go-to spot for diving into the world of animation with your students. Whether you're sketching out your first storyboard or aiming to nail those smooth transitions, we've got your back. Our blog is packed with easy-to-follow guides, cool project ideas, and tips to keep your students hooked from the first frame to the last. Join us to explore how animation can light up imaginations and make learning a blast. Let's animate and educate, one frame at a time!
Why Animation in the Classroom?
Using animation in the classroom isn't just about adding flair; it's a powerful tool for enhancing engagement and understanding. Animation can make complex ideas easier to grasp, transform boring lectures into lively lessons, and captivate students' attention like nothing else. Here's why it's such a game-changer:
Boosts Engagement: Kids love cartoons. By incorporating animation, teachers can make learning fun and interactive. Animated characters and stories can hold students' attention, making it easier to keep them engaged during lessons.
Enhances Understanding: Animation can break down complicated concepts into bite-sized, visual explanations. For instance, scientific processes, historical events, or mathematical theories can be illustrated through step-by-step animations, making them easier to understand and remember.
Supports Diverse Learning Styles: Not all students learn the same way. Some are visual learners, others are auditory, and some are kinesthetic. Animation caters to all these learning styles by combining visual elements, narration, and interactive activities. This inclusivity can help ensure that no student is left behind.
Fosters Creativity: Creating animations allows students to express their creativity. It encourages them to think critically about how to convey information visually and narratively. This creative process can enhance their problem-solving skills and boost their confidence.
Research-Backed Benefits: Studies have shown that educational animations can significantly improve learning outcomes. According to research by the International Journal of Instructional Technology and Distance Learning, animations can increase retention rates and comprehension levels in students. By visualizing abstract ideas, students can better understand and retain the information presented.
Real-World Examples: Take, for instance, the use of animations in explaining the water cycle. Instead of just reading about it, students can watch an animation showing the process of evaporation, condensation, and precipitation. This visual representation helps them grasp the concept more effectively.
In short, animation transforms the classroom into an engaging, dynamic learning environment. It makes lessons more interesting, caters to different learning styles, fosters creativity, and is backed by research. Ready to get animated in your teaching? Let's dive into how you can start making your own educational animations!
Getting Started with Animation
Diving into animation might seem intimidating at first, but with the right tools and guidance, it can be a breeze. Let's break down how you can kickstart your journey into creating educational animations, making your lessons more engaging and fun for your students.
Basic Animation Tools for Teachers
Starting simple is key. Here are some beginner-friendly animation tools that are perfect for educators:
- Animaker: Known for its user-friendly interface, Animaker offers a variety of templates and pre-made characters. You can create animations by dragging and dropping elements, making it ideal for those new to animation (Animaker).
- VideoScribe: This tool is excellent for creating whiteboard animations. It allows you to storyboard your lessons and add visual elements easily. Its intuitive design helps you focus on the content without getting bogged down by technical details (VideoScribe Blog).
- Renderforest: Offering a robust library of templates and scenes, Renderforest simplifies the animation process with presets that can be customized. This is great for quickly creating professional-looking animations without extensive effort (Renderforest) (Renderforest).
Step-by-Step Guide to Creating a Simple Animated Scene
Let's create a basic animation step-by-step using Animaker, which is highly recommended for beginners:
- Sign Up and Explore: Start by creating an account on Animaker. Once logged in, explore the dashboard to familiarize yourself with the tools and options available.
- Create a New Project: Click on "Create New" and choose a template that suits your lesson plan. For instance, if you're explaining the water cycle, pick a relevant educational template.
- Add Characters and Backgrounds: Use pre-made characters or create custom ones. Drag and drop your chosen characters onto the workspace. Next, select a background from the library or upload your own. Animaker allows you to customize the background with colors, gradients, or images (Animaker).
- Script and Voice-over: Write a simple script for your animation. This will guide your character's actions and dialogue. You can either record your voice or use the text-to-speech feature to add voice-overs that sync with your character's mouth movements (Animaker) (VideoScribe Blog).
- Animate Your Scene: Add animations to your characters by selecting actions like walking, talking, or jumping. Adjust the timing of these actions to match your script. Use transitions to smoothly move between different scenes or actions.
- Add Text and Effects: Include text boxes to highlight key points. Customize the font, color, and animation effects to make the text more engaging. Animaker provides a variety of effects to enhance the visual appeal of your animation (Animaker).
- Review and Export: Once your animation is complete, preview it to ensure everything flows smoothly. Make any necessary adjustments, then export your animation. You can download it or share it directly from the platform.
Tips for a Smooth Start
- Keep it Simple: Start with short, simple animations. This will help you get comfortable with the tools and techniques.
- Plan Ahead: Storyboarding your scenes can save a lot of time and make the animation process more straightforward.
- Experiment and Have Fun: Don’t be afraid to try different styles and techniques. Animation is a creative process, and experimenting can lead to surprising and delightful results.
Using these tools and steps, you'll be well on your way to creating engaging and educational animations that will captivate your students and enhance their learning experience. Ready to animate your classroom? Let’s get started!
Top Animation Tools for Educators
Finding the right animation tools can make a huge difference in your classroom. Let's look at some of the best options available, comparing their features, ease of use, and pricing to help you choose the one that fits your needs.
1. Adobe Animate
Adobe Animate is a powerful tool widely used in education for creating interactive animations. It integrates seamlessly with other Adobe products like Photoshop and Illustrator, making it easy to import and edit graphics. The software supports both 2D and 3D animations and is suitable for creating web content, games, and TV shows.
- Features: Customizable animation tools, real-time updates, pre-made characters, Adobe integration.
- Ease of Use: Suitable for beginners but offers advanced features for seasoned users.
- Pricing: $20.99/month with a free 7-day trial available (JUST™ Creative) (Creative Bloq).
2. Blender
Blender is a free, open-source 3D animation software that has gained popularity for its comprehensive feature set. It supports 3D modeling, rigging, animation, simulation, and rendering, making it a versatile choice for any classroom.
- Features: 3D modeling and sculpting, particle simulation, realistic material rendering, physics-based rigging.
- Ease of Use: Steeper learning curve, but extensive tutorials and community support can help beginners get started.
- Pricing: Free (Create and Go) (TechRadar).
3. Moho (Anime Studio) Debut
Moho Debut is designed for beginners and intermediate users, making it ideal for educational settings. It offers bone rigging, which simplifies character animation, and a variety of drawing tools.
- Features: Bone rigging, vector drawing tools, pre-made character templates, support for multilingual use.
- Ease of Use: User-friendly interface with advanced options for those who want to dive deeper.
- Pricing: $59.99, with a free trial available (Pixpa) (TechRadar).
4. Cartoon Animator 4
Cartoon Animator 4 is perfect for creating 2D animations quickly and easily. It includes features like auto lip-sync, facial tracking, and physics effects, making it a robust choice for educational use.
- Features: Auto lip-sync, facial puppet controls, physics engine, real-time motion capture.
- Ease of Use: Intuitive interface designed for fast learning and implementation.
- Pricing: Starting at $159 (JUST™ Creative) (Create and Go).
5. DigiCel FlipBook
DigiCel FlipBook is one of the simplest tools for creating traditional frame-by-frame animations. It’s great for educators who want to teach the fundamentals of animation without overwhelming students with too many features.
- Features: Frame-by-frame animation, onion skinning, direct import of sketches, sound synchronization.
- Ease of Use: Highly intuitive and designed for ease of use, even for young students.
- Pricing: Various packages starting at $19 (Pixpa) (TechRadar).
Tips for Choosing the Right Tool
When choosing an animation tool for your classroom, consider the following:
- Skill Level: Match the software to the skill level of your students. Tools like Blender are powerful but may require more time to learn, while DigiCel FlipBook offers simplicity.
- Budget: Free tools like Blender are excellent if you have budget constraints. However, investing in software like Adobe Animate might be worthwhile for its comprehensive features and integration capabilities.
- Project Needs: Identify the type of projects you'll be working on. For complex 3D animations, Blender is ideal. For simpler, cartoon-style animations, Cartoon Animator 4 or Moho might be more suitable.
These tools can transform your classroom, making learning more interactive and engaging through the magic of animation. Dive in, experiment, and watch your students' creativity come to life!
Creative Project Ideas
Animation in the classroom opens up a world of creativity for students. Here are some fun and engaging projects that can bring various subjects to life through animation.
Visual Poetry
Project Overview: Visual poetry combines literature and animation, helping students analyze and illustrate poetic lines. Choose a poem or a song with rich imagery, like "We Real Cool" by Gwendolyn Brooks or "Caged Bird" by Alicia Keys. Students read, discuss, and interpret the text, then create a visual representation using illustrations, photos, voice narration, and music that matches the poem’s mood.
Skills Developed: This project enhances students' understanding of literary devices and poetic imagery while introducing them to basic animation concepts through frame transitions (Creative Educator).
Stop Motion Music Video
Project Overview: Stop motion animation is a fantastic starting point for beginners. Students can create music videos using clay, LEGO bricks, or cut-out paper figures. They choose a song, design characters, and create a storyboard. Using stop motion techniques, they take multiple photos of their characters in different positions, then compile these images to animate the song.
Skills Developed: This project teaches students about timing, sequencing, and the basics of stop motion animation. It also encourages teamwork and creativity as they design sets and characters (Creative Educator).
Science Animations
Project Overview: Using animation to illustrate scientific concepts can make learning more interactive. For example, students can create animations depicting the water cycle, cell division, or Newton’s laws of motion. They start by drawing or crafting models, then animate these to show processes like evaporation and condensation, mitosis, or the impact of forces on motion.
Skills Developed: These projects help students visualize complex scientific processes, improving their understanding and retention. Animation projects in science also encourage logical thinking and problem-solving as students figure out how to visually represent abstract concepts (Creative Educator) (Creative Educator).
Historical Reenactments
Project Overview: Students can recreate historical events through animation, bringing history to life. They choose an event, research it, and create a storyboard. Using digital tools, they draw characters and settings, then animate key moments of the event, adding voiceovers to narrate the story.
Skills Developed: This project develops research and storytelling skills, while also teaching students how to use animation software. It makes history more engaging and helps students understand the significance and sequence of historical events (Creative Educator).
Mathematical Concepts
Project Overview: Animation can also simplify complex mathematical concepts. For instance, students can create animations that explain the unit circle in trigonometry, the steps of geometric proofs, or the principles of projectile motion. They use digital tools to draw and animate each step of the process.
Skills Developed: These projects enhance understanding of mathematical concepts through visualization and active engagement. They also develop students’ abilities to break down and explain complex problems visually (Creative Educator).
Student-Generated Stories
Project Overview: Encourage students to create their own stories and characters. They start with a storyboard, then design and animate their characters in a short film. This project can be tailored to any subject, from creating a story about a historical figure to an adventure involving scientific principles.
Skills Developed: This project fosters creativity, narrative skills, and technical proficiency in animation. It also encourages students to think deeply about the content they are animating and to express their understanding in a creative format (Creative Educator) (Creative Educator).
By integrating these creative projects into your classroom, you can make learning more engaging and interactive. Animation not only enhances understanding and retention but also allows students to express their creativity and take ownership of their learning. So, let’s get those creative juices flowing and start animating!
Tips for Smooth Animations
Creating smooth and professional-looking animations can seem tricky, but with the right techniques, you can make your animations look polished and engaging. Here are some top tips to help you achieve that smooth animation you're aiming for:
Master Timing and Easing
Timing is critical in animation. It determines how long an action takes and can influence how weighty or fluid an animation feels. Pay attention to how you space out your frames; more frames generally mean smoother animations. For example, slowing down the movement at the beginning and end of an action (known as easing) can make your animations look more natural. This technique, called "ease in and ease out," mimics how objects move in real life, starting slow, speeding up, and then slowing down again before stopping (Daisie Blog) (Tutvid).
Use Arcs for Natural Movement
In the real world, most movements follow an arc rather than a straight line. Applying this principle to your animations can make them look more fluid and natural. When animating a character’s limb or any other part, consider the arc of the motion to add realism and smoothness (Skillshare).
Apply Anticipation and Follow-Through
Anticipation involves preparing the viewer for an action, while follow-through refers to actions that occur after the main action, such as a character’s hair continuing to move after they’ve stopped. These principles help create more believable and smoother animations by adding a sense of weight and realism to the movement (Daisie Blog).
Add Secondary Actions
Secondary actions are smaller movements that complement the main action, adding depth and realism. For example, if a character is running, secondary actions might include the swaying of their hair or the movement of their clothes. These details make your animation more engaging and smooth (Skillshare).
Optimize Frame Rate and Keyframes
Animating at a higher frame rate, like 30 or 60 frames per second (fps), can help achieve smoother animations. Additionally, using keyframes wisely can make transitions between actions fluid. Make sure to add enough keyframes to capture the subtleties of the motion without making the animation look choppy (Tutvid) (FotoRealist).
Experiment with Sequential Animation
Sequential animation involves animating different parts of an object at different times. This technique can add a wave-like motion, enhancing the fluidity and depth of your animations. For instance, when animating a flag waving, you can animate each part at different intervals to create a more natural and smooth wave effect (Daisie Blog).
Utilize the Breakdowner Tool
For those using Blender, the Breakdowner tool can help create smooth transitions between keyframes. It allows you to blend poses seamlessly and fine-tune the movement. This tool is especially useful for making detailed adjustments and ensuring your animations flow smoothly (FotoRealist).
By incorporating these tips into your animation process, you can achieve smoother, more professional-looking animations that captivate and engage your audience. Happy animating!
Assessing and Showcasing Student Work
Using animation as a teaching tool is fantastic, but knowing how to assess and showcase student work can take it to the next level. Here’s how you can do just that:
Assessing Student Animations
1. Clear Rubrics and Criteria
- Develop a rubric that outlines specific criteria such as creativity, technical skills, storyline coherence, and educational value. Make sure these criteria are shared with students beforehand so they know what’s expected.
- Example criteria can include:
- Storytelling: How well does the animation convey the intended message or concept?
- Technical Execution: Are the animations smooth and well-timed?
- Creativity: Does the project show original thought and innovation?
- Educational Content: Is the information accurate and effectively communicated?
2. Provide Constructive Feedback
- Offer feedback that highlights both strengths and areas for improvement. Be specific about what worked well and what could be enhanced.
- Use a mix of written feedback and one-on-one discussions to ensure students understand and can act on the feedback.
- Encourage peer feedback sessions where students can review each other’s work, which fosters a collaborative learning environment.
3. Reflective Self-Assessment
- Encourage students to assess their own work through guided questions. This can help them become more critical of their own work and understand their learning process better.
- Questions for self-assessment might include:
- What did you enjoy most about creating your animation?
- Which part of your animation are you most proud of?
- What challenges did you face, and how did you overcome them?
Showcasing Animations
1. Class Presentations
- Organize a “movie day” where students can present their animations to the class. This not only showcases their work but also builds presentation skills.
- Create a supportive atmosphere where students feel comfortable sharing their creations.
2. Online Platforms
- Utilize online platforms such as YouTube, Vimeo, or even a class blog to share student animations with a wider audience. This can be particularly motivating for students, knowing their work can be viewed by family and friends.
- Ensure privacy settings and permissions are appropriately managed, especially when sharing content publicly.
3. School Events and Competitions
- Host animation festivals or contests within the school. This can be a great way to recognize and celebrate the hard work of students.
- Encourage participation in external competitions, which can provide students with broader exposure and new opportunities.
4. Peer Review and Collaboration
- Set up peer review sessions where students can give and receive feedback. This helps them learn to critique constructively and value different perspectives.
- Promote collaborative projects where students can work in teams to create animations. This not only fosters teamwork but also allows them to combine their skills for more complex projects.
By using these strategies, you can not only assess student work effectively but also celebrate their achievements, making the learning experience more rewarding and engaging for everyone involved (Times Higher Education (THE)) (ERIC) (Springer) (JLab Animation).